Chicken Sunday Roast

How to Cook Chicken Sunday Roast

The Sunday roast is a cherished British tradition, steeped in history and brimming with flavors. If you’ve ever yearned to cook an authentic Chicken Sunday Roast that would make even your British grandma proud, you’re in the right place. Let’s delve into this delicious journey together!

The Heart of a Sunday Roast: The Chicken
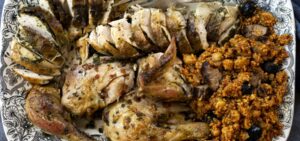
Chicken Roast
Chicken Roast

Cooking the perfect chicken is key to a memorable Sunday roast. You’re looking for crispy skin, juicy meat, and flavors that dance on your taste buds.

Choosing the Right Chicken

When it comes to selecting your chicken, the choices can feel a bit overwhelming. Organic, free-range, or conventionally raised chickens are typically found in most supermarkets. I always prefer free-range organic chickens. Not only do they taste better, but purchasing them supports more humane farming practices.

Prepping Your Chicken

Preparing the chicken properly is crucial. Here’s how you can do it:

  • Thawing: If your chicken is frozen, ensure it’s thawed completely in the fridge over 24-48 hours.
  • Cleaning: You might read mixed opinions on washing poultry, but patting it dry with a paper towel is a non-negotiable step. Dry chicken skin means a crispier roast.
  • Seasoning: Rub the skin and cavity generously with salt and pepper. My little secret? Add a squeeze of lemon along with chopped rosemary and thyme into the cavity. It doesn’t just enhance the flavor; it makes your kitchen smell divine!

Cooking Methods

Ingredient
Ingredient

Roasting your chicken slowly ensures even cooking and rich flavors.

  1. Preheat the Oven: 220°C (fan) or 425°F.
  2. Trussing: Tie the legs with cotton string to ensure even cooking.
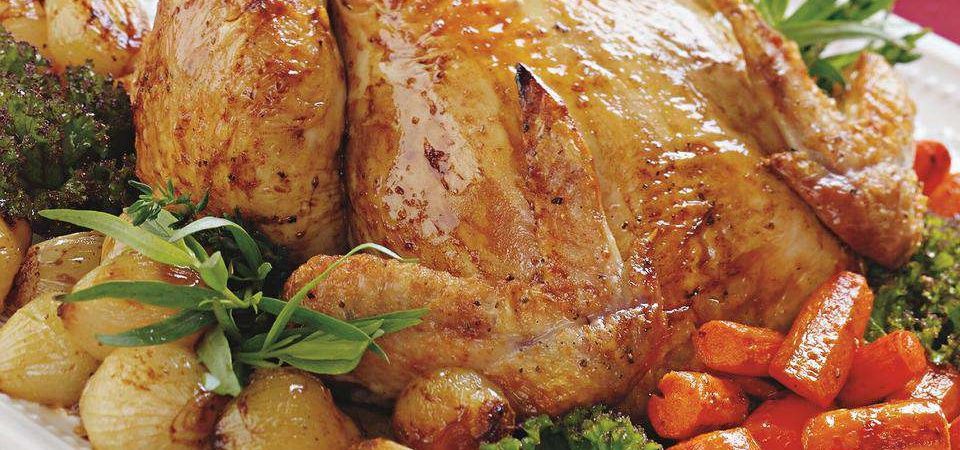
  3. Roasting: Place the chicken breast-side up in a roasting tray. A few glugs of olive oil and chunks of butter over the top work wonders.
  4. Time It: Roast for about 20 minutes per pound, about 1 hour and 20 minutes for a small chicken.
  5. Rest It: Let your chicken rest for at least 10-15 minutes before carving.

The Accompaniments: Veggies, Potatoes, and Gravy

A Sunday roast without its trappings is like fish without chips. The key components complementing the roasted chicken are just as essential.

The Veggies

Roast chicken goes beautifully with seasonal vegetables. My personal favorites are:

  • Carrots and Parsnips: Slice lengthwise, toss with honey and a bit of oil, then roast alongside the chicken in a separate tray.
  • Brussels Sprouts: Halve them and toss with olive oil and bacon bits for a crispy finish.

Potatoes: The Crunch Factor

No roast is complete without the perfect roasted potato. Here’s my tried-and-true method:

  • Parboil: Start by peeling and chopping potatoes, parboiling them for 10 minutes until tender.
  • Fluff Them Up: Drain and give them a good shake in the colander to roughen up the edges.
  • Oven Magic: Toss them in hot goose fat or olive oil and roast for 45 minutes alongside the chicken. The result is golden, crispy perfection!

Gravy: The Crowning Glory

A roasted chicken and potatoes are incomplete without a rich, silky gravy. If I’m honest, it’s my favorite part:

  • While the chicken is resting, use the pan drippings.
  • Add flour to thicken, stirring constantly to avoid lumps.
  • Gently whisk in chicken stock and a splash of white wine.

Bringing it All Together: Serving Suggestions

Chicken Roast
Chicken Roast

Presenting your Sunday roast is half the fun! Here are some tips to wow your guests:

Plating Up

Arrange the roasted veggies and potatoes around the carved chicken. Don’t forget to drench a generous amount of gravy over the top.

Side Ideas

  • Yorkshire Puddings are a classic British staple that can be store-bought or homemade.
  • A fresh salad of arugula with lemon dressing can add a refreshing touch.

Pairing your Meal

  • A crisp white wine, like Sauvignon Blanc, complements a chicken roast beautifully.
  • For the non-drinkers, a fizz of apple cider goes down just as well!

Personal Touch: Memories of Sunday Roast

I remember my first attempt at a Sunday roast. I recall the kitchen buzzing with laughter, pots clattering, and my family gathered around the table, waiting in anticipation. Cooking a roast is more than bringing food to the table; it’s about gathering loved ones for moments that turn into cherished memories.

“Cooking is love made visible.”

Wrapping Up

There’s something truly heartwarming about a Sunday roast. Whether you’re recreating memories or starting a new tradition, this Chicken Sunday Roast will surely be a hit. Now go ahead, warm up the oven, and treat yourself and your loved ones to a meal that’s as comforting as it is delectable.

Feel free to share your Sunday roast experiences in the comments—I’d love to hear how it went!
How to Cook Chicken Tikka Masala with the Right Flavor

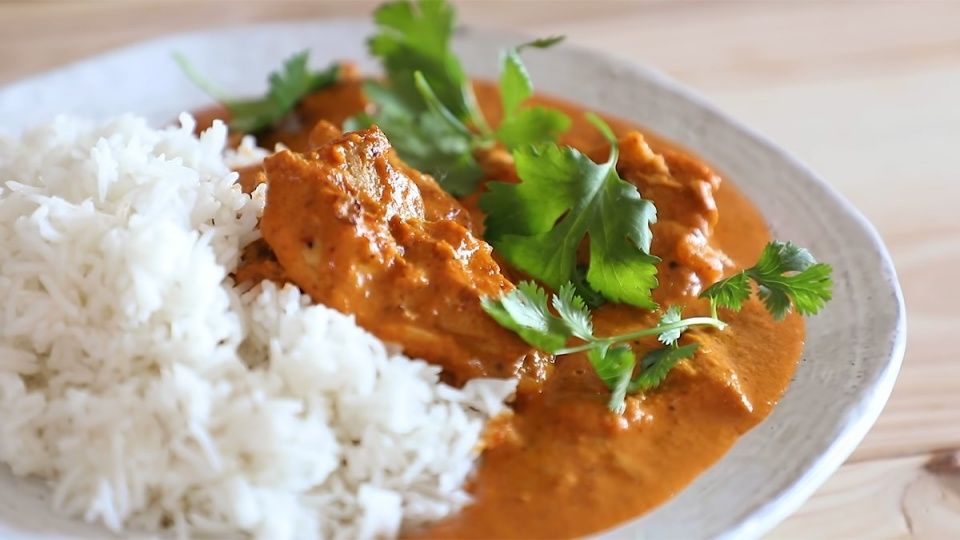
Welcome, dear reader, to the aromatic world of Chicken Tikka Masala! If you’re yearning for that perfect dish bursting with fragrance and flavor, then you’re in the right place. Today, we’ll journey together through a step-by-step process promises to bring an authentic taste of British Chicken Tikka Masala to your table. Grab your apron, and let’s get cooking!

Chicken Tikka Masala

Understanding Chicken Tikka Masala

Before we dive into cooking, it’s important to understand what makes this dish so special. Originally a South Asian dish, Chicken Tikka Masala has become a beloved staple in British cuisine. Marinated chicken pieces, tenderly grilled, are smothered in a creamy tomato sauce. The beautiful blend of spices and flavors is what makes this dish so delightful.

The Origin and Evolution

  • History: It’s often said that Chicken Tikka Masala was born in the UK when a chef added a tomato-based sauce to traditional chicken tikka. Though the details might be debated, its widespread popularity is undeniable.
  • Cultural Impact: It’s not just a dish; it’s a representation of the cultural blend that the UK is known for, symbolizing integration and innovation.

Choosing the Right Ingredients

Ingredients

Key Ingredients

To make a true-to-taste Chicken Tikka Masala, you’ll need the following:

  • Chicken: Boneless and skinless chicken thighs offer the best texture and flavor. They’re juicy and absorb marinades well.
  • Spices: Garam masala, cumin, coriander, turmeric, and chili powder are your core spices.
  • Marinade Essentials: Yogurt, lemon juice, garlic, and ginger.
  • Sauce Ingredients: Canned tomatoes, heavy cream, butter, and onion.

Tips for Selecting Fresh Ingredients

  • Meat Quality: Always opt for organic chicken if possible. Freshness impacts flavor significantly.
  • Spices: Whole spices are preferred as they retain their flavor longer. You can grind them as needed.
  • Produce: Fresh ginger and garlic over powdered versions, and ripe tomatoes for a sweet tanginess.

Preparing the Marinade

Ah, the marinade! It’s the heart of a Chicken Tikka Masala. A well-prepared marinade ensures that your chicken is flavorful down to the last bite.

Step-by-Step Guide

  1. Mix the Marinade: Combine yogurt, lemon juice, and the essential spices (garam masala, cumin, coriander, turmeric, and chili powder). Add grated garlic and ginger.
  2. Chicken Time: Cut chicken into bite-sized pieces. Coat them with the marinade, ensuring each piece is smothered in the mixture.
  3. Let it Rest: Cover the bowl and refrigerate. The longer the chicken marinates, the more robust the flavor. Ideally, let it sit overnight, but if you’re in a hurry, 4-6 hours should suffice.

Personal Tips

“I often make my marinade a day ahead. Not only does it save time on cooking day, but it also allows the flavors to deepen. On many occasions, I find myself doing a little taste test – it’s that irresistible!”

Cooking

the Chicken

Grilling or Baking?

  • Grilling: Offers an authentic smoky flavor reminiscent of traditional Indian tandoors. If you have an outdoor grill, use this method.
  • Baking: A convenient indoor alternative. Preheat your oven to 400°F (200°C) and spread the marinated chicken on a baking tray lined with foil. Bake for 20-25 minutes, turning halfway.

Getting the Texture Right

“The key is not to overcook the chicken, which can dry it out. It should be charred on the surface but juicy inside.”

Crafting the Sauce

This luxurious sauce is what elevates the dish. It’s rich, slightly spicy, and incredibly satisfying.

Ingredients Preparation

  • Onion Base: Finely chop onions; they should melt into the sauce.
  • Tomato Purée: Use good quality canned tomatoes or fresh ones blended into a purée.
  • Cream and Butter: These make the sauce creamy and velvety.

Making the Sauce

  1. Sauté the Onions: In a pan, melt some butter and add the onions until they’re golden and translucent.
  2. Spice it Up: Add garlic, ginger, and remaining spices – you’ll want a heady, aromatic mixture.
  3. Tomatoes and Cream: Pour in the tomato purée, followed by a splash of cream. Stir well to combine.
  4. Mix in Chicken: Add your grilled or baked chicken into the sauce and let it simmer, soaking up all those luscious flavors.

Tricks for Perfection

  • Consistency: If the sauce is too thick, a bit of water or chicken broth can thin it appropriately.
  • Taste Test: Always taste to adjust salt and spice levels. Trust those taste buds!

Garnishing and Serving Suggestions

Once your Chicken Tikka Masala is ready, it’s time to think about presentation and sides.

Garnishes

  • Fresh Cilantro: A sprinkle of chopped cilantro adds color and freshness.
  • Lemon Wedges: Serve with lemon wedges on the side for those who enjoy a zesty twist.

Side Dishes

  • Naan Bread: Soft, buttery naan works a treat for scooping up that delicious sauce.
  • Basmati Rice: Its fragrant grains provide the perfect canvas for the rich flavors of the dish.
  • A Fresh Salad: Cucumber and mint salad for a refreshing contrast.

“Whenever I serve Chicken Tikka Masala, I love creating a little feast. The naan and rice act as perfect companions, complementing the dish’s rich flavors.”

Conclusion

Chicken Tikka Masala

And there we have it, folks! A journey through the art of cooking Chicken Tikka Masala with authentic British flair. With the right ingredients, a bit of patience, and our detailed guide, you’ll recreate this restaurant favorite at home with ease.

Feel free to experiment and tweak things to your liking. After all, cooking is as much about personal joy as it is about flavor. Now, gather your loved ones, serve up your masterpiece, and savor the delicious rewards of your culinary adventure.

Enjoy your cooking!