Author: clark

How to Make Spotted Dick

How to Make Spotted Dick – A Timeless British Dessert

Spotted Dick is one of Britain’s most cherished traditional desserts, steeped in history and full of charm. Despite its amusing name, this suet pudding with dried fruits is nothing short of delightful. While “dick” is believed to be a colloquial term for pudding or a corruption of the word “dough,” “spotted” alludes to the raisins or currants scattered throughout the pudding. Regardless of its origin, Spotted Dick has held its place as a classic comfort food enjoyed by families for generations.

If you’ve never made this dessert before, you’re in for a treat. Spotted Dick is surprisingly simple to prepare, and the process itself is a rewarding step back into culinary history. This recipe will guide you through every step, ensuring you achieve a perfect pudding that’s moist, fruity, and wonderfully satisfying.


Spotted Dick
Spotted Dick


A Brief History of Spotted Dick

Spotted Dick originated in the 19th century, during a time when suet-based puddings were a staple in British households. These steamed puddings were affordable, filling, and made use of ingredients that were readily available. The dessert was often served with custard, which remains its classic pairing today.

While its popularity waned slightly with the rise of modern desserts, Spotted Dick has seen a resurgence in recent years, celebrated for its nostalgic appeal and hearty flavor.


Ingredients for Spotted Dick

To serve 6 people, you will need:

For the pudding:

  • 225g (2 cups) self-raising flour.
  • 100g (1/2 cup) shredded suet (or cold, grated butter for a vegetarian option).
  • 100g (1/2 cup) raisins or currants.
  • 50g (1/4 cup) caster sugar.
  • 1 teaspoon baking powder.
  • One lemon’s zest (optional, for added flavor).
  • 150ml (2/3 cup) milk.
  • A pinch of salt.

For steaming:

  • Butter for greasing.
  • A big piece of foil and parchment paper.
  • String for tying.

For serving:

  • Warm custard (store-bought or homemade).


Spotted Dick
Spotted Dick


Step-by-Step Instructions

Step 1: Prepare the pudding mixture

  1. Combine the dry ingredients: Put the self-raising flour, baking powder, grated butter or shredded suet, and a pinch of salt in a large mixing basin. To uniformly spread the ingredients, give it a good stir.
  2. Add the fruit and zest: Toss in the raisins or currants and mix them through the dry ingredients. If you’re using lemon zest, add it now for a hint of citrusy brightness.
  3. Incorporate the milk: Gradually add the milk, stirring with a wooden spoon until the mixture comes together into a soft but not sticky dough. You may need slightly more or less milk depending on the humidity and your flour.

Step 2: Shape the pudding

  1. Form the pudding: Lightly flour your hands and shape the dough into a round or log-like shape, depending on your preference. Spotted Dick is traditionally cylindrical, but a round pudding works just as well.
  2. Prepare for steaming: Butter a large piece of parchment paper and a sheet of foil. Place the pudding on the parchment paper, then wrap it up snugly, leaving room for the pudding to expand as it steams. Secure the wrapping with string, tying it firmly but not so tight that the pudding cannot expand.

Step 3: Steam the pudding

  1. Set up the steamer: Fill a large pot with enough water to come halfway up the side of the wrapped pudding. Place a trivet or an upturned plate at the bottom of the pot to keep the pudding from direct contact with the pot’s base.
  2. To make the pudding steam, bring the water to a boil and then lower the heat to a low simmer. Place the wrapped pudding in the pot and cover it with a tight-fitting lid. For one and a half to two hours, steam, monitoring often to make sure the water level is still sufficient. When necessary, top with boiling water.

Step 4: Check and serve

    1. Test for doneness: Carefully unwrap the pudding after the steaming time and check that it’s cooked through. A skewer inserted into the center should come out clean.
    2. Serve immediately: Slice the pudding into generous portions and serve it warm, topped with lashings of creamy custard.

Homemade Custard Recipe

No Spotted Dick is complete without a velvety custard to accompany it. The following is a basic recipe for homemade custard:

Ingredients:

  • 500ml (2 cups) whole milk.
  • 4 large egg yolks.
  • 2 tablespoons caster sugar.
  • 1 teaspoon vanilla extract.
  • 1 tablespoon cornflour (optional, for a thicker custard).

Instructions:

  1. Heat the milk: In a saucepan, gently heat the milk until it’s just about to simmer. Do not let it boil.
  2. Beat the eggs and sugar: Beat the egg yolks, sugar, and cornflour (if using) in a bowl until they are smooth.
  3. Combine and thicken: Slowly pour the hot milk into the egg mixture while whisking continuously. Return the mixture to the saucepan and heat gently, stirring constantly, until it thickens to your desired consistency.
  4. Serve the warm custard over the Spotted Dick after adding the vanilla essence and stirring.

Spotted Dick
Spotted Dick


Tips for a Perfect Spotted Dick

  1. Use quality suet: Suet is traditional for Spotted Dick and gives it a rich texture. If you can’t find suet, cold, grated butter works as a good substitute.
  2. Don’t skimp on the fruit: The raisins or currants provide bursts of sweetness that balance the richness of the pudding.
  3. Steam properly: Keep the water at a gentle simmer during steaming to ensure the pudding cooks evenly without drying out.

Variations on the Classic Recipe

Spotted Dick is wonderfully adaptable, and you can tweak the recipe to suit your taste:

  • Chocolate twist: Add a handful of chocolate chips to the mixture for a modern twist.
  • Nutty flavor: Mix in some chopped nuts like almonds or walnuts for added texture.
  • Citrus delight: Use orange zest instead of lemon for a sweeter, more fragrant pudding.

The Joy of Spotted Dick

Spotted Dick isn’t just a dessert; it’s a connection to Britain’s culinary heritage. Making it at home is a delightful experience, from preparing the dough to unwrapping the steaming, aromatic pudding. There’s something incredibly satisfying about serving this warm, fruity treat to your family or friends, especially when paired with custard.

While modern desserts often emphasize speed and convenience, Spotted Dick reminds us of the joys of slow cooking and tradition. It’s a dish that brings people together, whether you’re enjoying it at a family gathering or as a cozy indulgence on a quiet evening.

So why not give Spotted Dick a try? Roll up your sleeves, gather your ingredients, and let the magic of this timeless pudding transport you to the heart of British culinary history.

Enjoy every bite!

Toad in the Hole Recipe

Toad in the Hole Recipe

If you’ve never heard of “Toad in the Hole,” you might think it’s something unusual, maybe even a little strange. But don’t let the quirky name fool you—this dish is a comforting classic that’s been cherished in British homes for generations. At its core, Toad in the Hole is simply sausages baked in a golden, crispy batter, similar to Yorkshire pudding, and served with rich gravy and vegetables. It’s simple, hearty, and absolutely delicious. In this guide, we’ll walk through every step of preparing this beloved dish from scratch so you can enjoy it right at home.


Toad in the Hole
Toad in the Hole


What Is Toad in the Hole?

Despite its peculiar name, Toad in the Hole doesn’t involve actual toads—or any amphibians, for that matter. The name supposedly comes from the appearance of the dish: the sausages peeking out of the batter look like toads poking their heads out of a hole.

This dish dates back to the 18th century and was originally a way to stretch meat to feed larger families. Cheaper cuts of meat, like offal, were used instead of sausages. Over time, the recipe evolved, and sausages became the star of the dish. Today, it’s a comforting meal, perfect for a chilly evening, and often enjoyed with a drizzle of onion gravy.


Ingredients for Toad in the Hole

To serve 4 people, here’s what you’ll need:

For the batter:

  • 1 cup (125g) all-purpose flour.
  • 2 large eggs.
  • 1 cup (250ml) milk.
  • A pinch of salt and pepper.

For the sausages:

  • 6 sausages (pork sausages are traditional, but chicken or vegetarian options work too).

Optional for serving:

  • Onion gravy (you can make your own or use store-bought).
  • Steamed vegetables like carrots, peas, or green beans.

Toad in the Hole
Toad in the Hole

Step-by-Step Instructions

Step 1: Make the batter

The batter is key to a good Toad in the Hole, and it’s essentially the same as Yorkshire pudding. Follow these steps to ensure it’s light and airy:

  1. In a mixing bowl, sift the flour and add a pinch of salt.
  2. Crack the eggs into the flour and mix until you have a smooth paste.
  3. To avoid lumps, add the milk gradually while stirring.
  4. Continue whisking until the batter is smooth and has a consistency similar to pancake batter.
  5. Give the batter a minimum of half an hour to rest. Resting allows the gluten to relax, resulting in a better rise during baking.

Step 2: Prepare the sausages

  1. Preheat your oven to 425°F (220°C).
  2. Place the sausages in a large, ovenproof dish. A metal roasting tin works best because it heats evenly.
  3. Drizzle a bit of vegetable oil over the sausages and place the dish in the oven for about 10 minutes. This step allows the sausages to start browning and ensures the dish is hot enough for the batter later.

Step 3: Assemble and bake

  1. After the sausages have started to brown, remove the dish from the oven.
  2. Quickly pour the batter over the sausages. The hot oil and dish will cause the batter to sizzle, helping it rise beautifully in the oven.
  3. Return the dish to the oven immediately and bake for 25–30 minutes. Resist the urge to open the oven door during baking, as this can cause the batter to deflate.
  4. The Toad in the Hole is ready when the batter is puffed up and golden brown.

Some Advice for the Ideal Toad in the Hole

    1. Use the right dish: A metal roasting tin works better than glass or ceramic, as it retains heat more effectively.
    2. Preheat everything: Ensure the dish and oil are sizzling hot before adding the batter. This is the secret to achieving a crispy, golden crust.
    3. Rest the batter: Allowing the batter to rest improves its texture and helps it rise higher.
    4. Don’t overfill: The batter should sit below the edge of the dish to prevent spills as it puffs up.

How to Make Onion Gravy
No Amphibian in the Gap is total without a wealthy, savory sauce. Here’s a speedy formula for onion gravy:

Ingredients:
expansive onions, meagerly sliced.
2 tablespoons of butter.
1 tablespoon of flour.
glasses (500ml) meat or vegetable stock.
sprinkle of Worcestershire sauce (optional)

Toad in the Hole
Toad in the Hole


Instructions:

Melt the butter in a pot over medium heat.
Add the cut onions and cook until caramelized, almost 15–20 minutes. Blend sometimes to anticipate burning.
Sprinkle the flour over the onions and mix to coat. Cook for another 2–3 minutes to expel the crude taste of the flour.
Gradually pour in the stock whereas mixing to avoid lumps.
Simmer for 10 minutes, permitting the sauce to thicken. Include Worcestershire sauce for additional flavor, if desired.

Serving Suggestions
Toad in the Gap is a flexible dish that sets well with a assortment of sides. Here are a few ideas:

Vegetables: Serve with steamed carrots, green beans, or peas for a adjusted meal.
Mashed potatoes: Rich pound complements the fresh hitter perfectly.
Pickles: Conventional British pickles include a tart differentiate to the wealthy flavors.

Why You’ll Adore Amphibian in the Hole
This dish is everything you need in consolation nourishment: warm, healthy, and simple to make. It’s moreover profoundly adaptable—you can utilize diverse sorts of wieners or indeed include herbs like rosemary or thyme to the hitter for additional flavor. Also, it’s a phenomenal way to bring a taste of British convention to your kitchen.

So why not deliver Amphibian in the Gap a attempt? It’s a dish that’s as fun to make as it is to eat. Whether you’re cooking for your family, facilitating companions, or fair treating yourself, this formula is beyond any doubt to impress.

Enjoy your custom made Amphibian in the Gap, and don’t disregard the sauce!

Steamed Lemon Pudding Recipe

Steamed Lemon Pudding Recipe

Creating an authentic Steamed Lemon Pudding with Treacle Sauce is a journey into the world of classic British desserts, loved for its warm, comforting flavors and delicate citrus notes. This pudding combines a light, spongy lemon pudding with a rich, sticky treacle sauce, which adds a warm, caramelized sweetness. Perfect for chilly days or special occasions, it’s both elegant and nostalgic.

Here’s a step-by-step guide to making this delicious dessert from scratch, with tips on steaming, balancing flavors, and achieving the perfect texture.

Steamed Lemon Pudding

1. Background of Steamed Pudding in British Cuisine

Steamed puddings are an integral part of traditional British cooking, often served as a comforting end to a meal. Originating in Victorian times, steamed desserts became popular due to their easy preparation using pantry ingredients and their ability to stay moist and rich without drying out, a common problem with baked desserts. Steamed lemon pudding, specifically, brings a fresh twist with its bright citrus flavor, and the treacle sauce offers a wonderful, caramel-like balance.


2. Ingredients for Authentic Steamed Lemon Pudding with Treacle Sauce

To make this dessert, you’ll need quality ingredients. The following is a list of preparations:

For the Steamed Lemon Pudding:

  • 175g (¾ cup) unsalted butter, softened
  • 175g (¾ cup) caster sugar
  • 3 large eggs
  • Zest of 2 lemons (for a strong lemon flavor)
  • Juice of 1 lemon
  • 175g (1 ½ cups) self-raising flour, sifted
  • A pinch of salt

For the Treacle Sauce:

  • 150g (¾ cup) golden syrup
  • 1 tbsp black treacle (or molasses for a deeper flavor)
  • 2 tbsp unsalted butter
  • 2 tbsp heavy cream (optional, for a silkier texture)

3. Equipment Needed

A steamed pudding needs specific equipment to get the perfect texture and consistency:

  • Pudding Basin: A ceramic or metal basin with a lid is ideal, but you can cover a regular bowl with parchment and foil if necessary.
  • Steaming Setup: A large pot with a trivet or a steaming basket to hold the basin off the base.
  • Baking Parchment and Foil: To securely cover the basin and prevent water from seeping into the pudding.

Steamed Lemon Pudding

4. Preparing the Lemon Pudding Batter

  1. Cream Butter and Sugar: In a large mixing bowl, cream the butter and sugar together until light and fluffy. This helps incorporate air, giving the pudding its signature light texture.
  2. Add the eggs: Beat each one in until it’s completely combined, then add the next one. This gradual incorporation prevents the batter from curdling and keeps it smooth.
  3. Incorporate Lemon Zest and Juice: Add the lemon zest and juice, stirring to combine. The zest is crucial for intense lemon flavor, as it contains essential oils that won’t bake away like lemon juice might.
  4. Fold in Flour: Sift the flour and salt into the bowl and fold gently, ensuring the batter remains light and airy. Folding rather than stirring vigorously helps maintain the pudding’s softness.
  5. Prepare the Pudding Basin: Grease your pudding basin thoroughly with butter, then spoon in the batter. Smooth the top with a spatula, but don’t press it down too firmly – a little extra space in the basin allows for rising.

5. Steaming the Lemon Pudding

  1. Cover the Basin: Place a circle of baking parchment over the pudding’s surface, then cover with a layer of foil. Make sure to secure the foil tightly around the edge of the basin, and create a pleat to allow room for the pudding to expand.
  2. Prepare the Pot: Fill a large pot with about 2 inches of water and bring it to a gentle simmer. Place a trivet or steaming basket in the pot to prevent the basin from touching the water directly.
  3. Steam the Pudding: Place the pudding basin on the trivet in the pot, then cover the pot with a lid. Give the pudding one and a half to two hours to steam. Keep an eye on the water level, topping it up with boiling water as needed to maintain a steady steam.
  4. Check for Doneness: After 1.5 hours, carefully remove the basin’s covering to check if the pudding is set. When a skewer is placed in the middle, it should emerge clean. If it’s still wet, cover it back up and steam for another 10-15 minutes.

6. Making the Treacle Sauce

Treacle sauce provides the rich sweetness that complements the tart lemon pudding. Here’s how to make it:

  1. Combine Syrup and Treacle: In a small saucepan, warm the golden syrup and black treacle over low heat. Stir gently to combine, allowing the treacle to melt into the syrup.
  2. Add Butter and Cream: Stir in the butter, letting it melt completely into the mixture. If you want a smoother, creamier sauce, add the heavy cream. Heat until just combined – avoid boiling.
  3. Adjust Consistency: If you prefer a thicker sauce, simmer the mixture for a minute or two until it reaches the desired thickness.

7. Serving the Steamed Lemon Pudding

  1. Turn Out the Pudding: Let the pudding cool slightly, then run a knife around the edge to loosen it. Invert it onto a plate, tapping gently to release it from the basin.
  2. Pour Over the Treacle Sauce: Drizzle the warm treacle sauce over the pudding, allowing it to seep into the surface and coat the edges. For those who would want additional sauce, you may also offer it on the side.
  3. Garnish (Optional): Serve with a dollop of whipped cream, custard, or a scoop of vanilla ice cream for extra indulgence.

Steamed Lemon Pudding

8. Tips for a Perfect Steamed Pudding

  • Prevent Water from Entering: Secure the parchment and foil tightly around the basin to avoid water seeping in during steaming.
  • Steady Temperature: Keep the water at a gentle simmer; a rapid boil can make the pudding dense.
  • Don’t Rush the Steaming Process: Steamed puddings require time to develop their texture. Avoid removing the lid from the pot too often, as this releases steam and reduces the overall temperature.

9. Storing and Reheating

Here’s how to preserve leftovers if you have any:

  • Refrigerate: Any leftovers may be kept in the refrigerator for up to three days in an airtight container.
  • Reheat: Gently reheat the pudding by steaming it again for 20 minutes, or microwave individual portions. Warm the treacle sauce separately for pouring.

10. Variations on Steamed Lemon Pudding with Treacle Sauce

For those interested in exploring different flavors, here are a few delightful variations:

  • Lemon and Ginger: Add grated fresh ginger or powdered ginger to the batter for a warming twist.
  • Orange and Treacle: Substitute lemon zest and juice with orange for a milder citrus flavor.
  • Maple Treacle Sauce: Replace golden syrup with maple syrup in the sauce for a unique sweetness.

Final Thoughts

Making Steamed Lemon Pudding with Treacle Sauce from scratch is a labor of love that rewards with its rich flavors and comforting warmth. Following these steps and tips will help you achieve the light, fluffy texture of the pudding and the indulgent richness of the treacle sauce. This British dessert is perfect for gatherings, holidays, or as a treat for those nostalgic for traditional recipes. Enjoy the satisfaction of creating this pudding and savoring every bite!

Pork Pies Recipe

Pork Pies Recipe

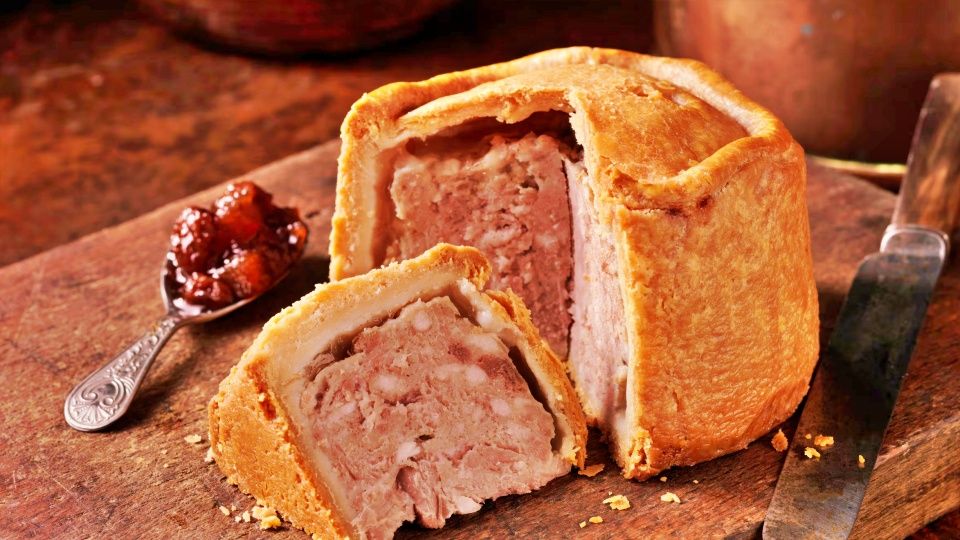
Creating an authentic pork pie is a rewarding experience that celebrates the art of British baking. This traditional savory pastry, often enjoyed at picnics, holidays, and pub lunches, combines spiced, minced pork and a rich, hot water crust pastry. It’s a favorite in the UK, particularly in the Midlands, where the famous Melton Mowbray pork pie originates.

Here’s a comprehensive guide on making pork pies, including tips for working with hot water crust pastry, seasoning the filling, and achieving the signature look and texture of this British classic.


1. Introduction to Pork Pies

Pork pies are a staple in British cuisine, notable for their dense, flavorful filling and thick pastry crust. Originating in the 18th century in Melton Mowbray, these pies were initially popular among hunters who needed a portable, nutritious food. They’re traditionally served cold, showcasing the contrast between the savory meat filling and the slightly salty, firm pastry.

Pork Pies
Pork Pies

2. Ingredients for Authentic Pork Pies

To make an authentic pork pie, you’ll need the following ingredients:

For the Filling:

  • 500g pork shoulder, finely chopped
  • 100g fatty bacon, finely chopped
  • 1/2 tsp salt
  • 1/2 tsp black pepper
  • 1/2 tsp ground white pepper
  • 1/4 tsp nutmeg
  • 1/4 tsp allspice
  • Fresh thyme (optional, for extra flavor)

For the Hot Water Crust Pastry:

  • 400g all-purpose flour
  • 100g lard
  • 100ml water
  • 1/2 tsp salt

For the Jelly (optional but traditional):

  • 1 pork stock cube
  • 200ml boiling water
  • 2 gelatin leaves or 1 tbsp powdered gelatin

3. Preparing the Pork Pie Filling

  1. Choosing the Pork: Pork shoulder provides the right balance of meat and fat, giving the filling a tender and juicy texture. Finely chop the pork and bacon into small pieces, as grinding the meat can result in a less authentic texture.
  2. Seasoning: In a large bowl, combine the chopped pork and bacon with salt, black pepper, white pepper, nutmeg, and allspice. Mixing spices thoroughly helps distribute flavor throughout the filling. Adjust the seasoning according to taste, remembering that pork pies are typically well-seasoned.
  3. Adding Herbs (Optional): Fresh thyme or sage can add depth to the flavor, though they’re not always included in traditional recipes. Use them sparingly to avoid overpowering the meat.

4. Making Hot Water Crust Pastry

Hot water crust pastry is essential for pork pies, as it’s sturdy enough to hold the filling without collapsing. Here’s how to prepare it:

  1. Combine Flour and Salt: In a large mixing bowl, sift the flour and add salt. Create a well in the center.
  2. Heat Water and Lard: In a saucepan, heat the water and lard together until the lard melts and the mixture begins to boil. Hot water and fat might splatter, so use caution.
  3. Mix to Form a Dough: Pour the hot water and lard mixture into the flour well, stirring with a wooden spoon to bring the dough together. Once it’s cool enough to handle, knead the dough lightly to ensure it’s smooth and pliable.
  4. Chill the Dough: Wrap the dough in plastic wrap and allow it to rest in the refrigerator for about 30 minutes. Chilling the dough makes it easier to roll out and mold into the pie form.

Pork Pies
Pork Pies

5. Assembling the Pork Pies

To create individual pies or a large pie, follow these steps:

  1. Roll Out the Pastry: Divide the chilled dough into portions if making individual pies. Roll each portion into a circle, keeping the pastry about 1/4 inch thick. Reserve some dough for the pie lids.
  2. Molding the Pastry: Press the rolled dough into a greased pie mold or tin, making sure there are no cracks. Leave a small overhang of dough to help seal the pie later.
  3. Fill with Pork Mixture: Spoon the seasoned pork filling into the pastry shell, pressing down to compact it slightly. Fill up to the top, leaving a small space for the lid.
  4. Add the Lid: Roll out the remaining dough for the lids. Place each lid on top of the filling, pressing the edges to seal. Using your fingers or a fork, crimp the edges of the pastry and trim off any excess.
  5. Make a Steam Hole: Make a little hole in the middle of each lid with a skewer.. This allows steam to escape during baking and will be useful later when adding the jelly.

6. Baking the Pork Pies

  1. Preheat the Oven: Preheat your oven to 180°C (350°F).
  2. Bake: Place the pies on a baking tray and bake for 50-60 minutes or until the pastry is golden brown. The filling should reach an internal temperature of 70°C (160°F) to ensure the pork is fully cooked.
  3. Cool the Pies: Once baked, remove the pies from the oven and let them cool in the molds. Pork pies are traditionally eaten cold, so cooling allows the flavors to meld.

7. Making the Jelly Filling (Optional)

Traditional pork pies include a savory jelly, poured into the pie through the steam hole. This adds moisture to the filling and helps preserve the pie.

  1. Dissolve Gelatin: In a bowl, dissolve gelatin in 200ml of boiling water with a pork stock cube. Stir until fully dissolved.
  2. Pour into Pies: Using a funnel, pour the liquid gelatin into each pie through the steam hole until it’s full. Let the pies cool in the fridge to allow the jelly to set.

Pork Pies
Pork Pies

8. Tips for Success

  • Patience with the Pastry: Hot water crust pastry can be challenging to work with. If it cracks or dries out, a little warm water can help smooth it out.
  • Don’t Skip Seasoning: Pork pies are known for their robust flavor. Taste the filling before assembling to ensure it’s well-seasoned.
  • Allow Cooling Time: Pork pies taste best when allowed to cool completely, as this helps set the filling and enhances the flavors.

9. Serving and Storage

Pork pies are traditionally served cold, often with a side of pickles, chutney, or mustard. Here’s how to store and enjoy them:

  • Refrigerate: Store pork pies in the fridge for up to 5 days. They make excellent picnic fare or snacks.
  • Freeze: Pork pies can also be frozen for up to 2 months. Before serving, thaw them in the fridge.

Final Thoughts

Making authentic pork pies is a delicious journey into traditional British cuisine. The combination of spiced pork filling and sturdy hot water crust creates a flavor-packed treat perfect for any occasion. Follow this recipe and the steps outlined, and soon you’ll be able to enjoy a homemade version of this British classic!

Authentic Bangers And Mash

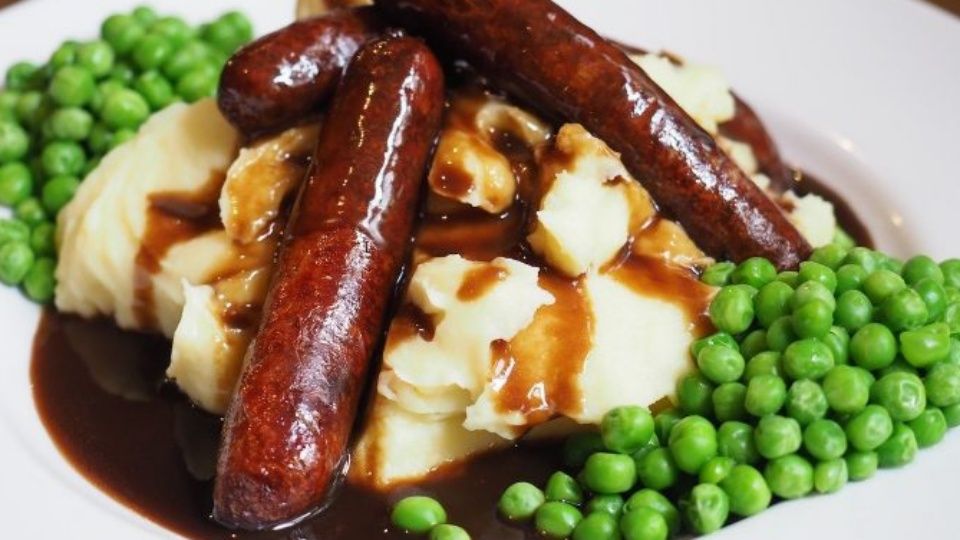
Creating an authentic Bangers and Mash at home is a wonderful way to bring a taste of traditional British comfort food to your kitchen. This classic dish combines savory sausages, creamy mashed potatoes, and a rich onion gravy, creating a hearty, flavorful meal perfect for cozy dinners. Below is a comprehensive guide on preparing this iconic meal from scratch, focusing on each element to ensure authenticity and depth of flavor.


1. Background of Bangers and Mash

Originating in Britain, Bangers and Mash have become a staple in pubs and homes across the UK. Sausage is referred to as “bangers” because of the high water content in traditional British sausages, which may sometimes “bang” or explode when cooking. The “mash” refers to the creamy, buttery mashed potatoes served alongside the sausages. Onion gravy, a savory addition, enhances the flavors of both the sausage and potatoes, making it a beloved comfort food.

Bangers and Mash
Bangers and Mash

2. Ingredients

For an authentic Bangers and Mash, it’s essential to select high-quality ingredients. Here’s what you’ll need:

For the Bangers (Sausages):

  • 4-6 pork sausages (ideally Cumberland or Lincolnshire for authenticity)
  • Olive oil or butter, for cooking

For the Mash:

  • 1 ½ lbs of potatoes (Yukon Gold or Russet work well)
  • 4 tbsp butter
  • ½ cup milk or cream (warm)
  • Salt and pepper, to taste

For the Onion Gravy:

  • 2 large onions, thinly sliced
  • 2 tbsp butter
  • 1 tbsp olive oil
  • 1 tsp sugar
  • 1 tbsp all-purpose flour
  • 1 ½ cups beef stock
  • 1 tsp Worcestershire sauce
  • Salt and pepper, to taste

3. Step-by-Step Instructions

Step 1: Preparing the Sausages (Bangers)

  1. Choose the Right Sausages: For the most authentic experience, try to find British-style pork sausages. Cumberland and Lincolnshire varieties are known for their coarse texture and herby, peppery flavors.
  2. Cooking the Sausages: Heat a skillet over medium heat, adding a small amount of olive oil or butter. Place the sausages in the skillet, ensuring they have room to cook evenly. Cook them slowly, turning every few minutes, for about 10-12 minutes until they’re brown on the outside and cooked through inside. Cooking them slowly helps prevent bursting and gives them a more caramelized flavor.

Step 2: Making the Mash

  1. Preparing the Potatoes: Peel the potatoes and cut them into evenly sized chunks for uniform cooking. Place them in a pot of salted cold water and bring them to a boil. Cook for 15-20 minutes or until tender.
  2. Mashing the Potatoes: Drain the potatoes and return them to the pot over low heat to evaporate any remaining water. Add the butter, and mash the potatoes until smooth. Gradually add the warm milk or cream, stirring to incorporate. Season with salt and pepper, tasting and adjusting as needed for a creamy and well-seasoned mash.

Step 3: Making the Onion Gravy

  1. Caramelizing the Onions: In the same skillet used for the sausages, add butter and olive oil, then add the sliced onions. Cook over medium-low heat, stirring occasionally, until the onions soften and begin to caramelize. To make the onion taste sweeter and more complex, add a teaspoon of sugar. It may take ten to fifteen minutes to complete this operation.
  2. To make the gravy thicker, add the flour to the onions and swirl to mix. Allow the flour to cook for a minute to remove any raw flavor. Slowly pour in the beef stock, stirring constantly to avoid lumps.
  3. Seasoning and Adding Depth: Add Worcestershire sauce, and season with salt and pepper. Let the gravy simmer for 5-10 minutes until thickened to your liking. Adjust seasoning as needed.

Step 4: Bringing It All Together

  • Serve the Dish: Place a generous portion of mashed potatoes on each plate, nestle a sausage or two beside the mash, and generously pour onion gravy over both. Garnish with fresh herbs like parsley or chives for a bit of color if desired.

Bangers and Mash
Bangers and Mash

4. Tips for Perfect Bangers and Mash

  • Selecting Sausages: Authentic British sausages often have a coarser texture and a blend of herbs. Avoid overly lean sausages for this dish, as the fat adds flavor and moisture.
  • For Extra Creaminess in the Mash: Use Yukon Gold potatoes, which have a naturally creamy texture. For even more indulgence, add a dollop of sour cream or cream cheese along with the butter.
  • Flavoring the Gravy: Adding a splash of red wine or balsamic vinegar to the onion gravy can give it extra depth and enhance its rich flavor.

5. Variations on Bangers and Mash

  • Vegetarian Option: Use vegetarian sausages and vegetable stock in the gravy for a meat-free version.
  • Cheesy Mash: Add shredded cheddar cheese to the mashed potatoes for an extra creamy and cheesy version.
  • Different Sausages: Experiment with different sausage types, like venison or chicken, to create new flavor combinations while maintaining the spirit of Bangers and Mash.

6. Pairing Suggestions and Serving Ideas

Bangers and Mash pairs well with traditional British sides and beverages. Try serving it with:

  • Peas or Mushy Peas: A classic British side that adds color and texture.
  • Ale or Stout: Traditional British ales and stouts complement the rich flavors of the sausages and gravy.
  • Crispy Fried Onions: A handful of fried onions on top of the mash adds a crunchy texture.

7. Storage and Reheating

Keep leftovers in sealed containers if you have any:

Bangers and Mash
Bangers and Mash
  • Refrigerating: Both the sausages and mash can be stored in the fridge for up to 3 days.
  • Freezing: You can freeze the mashed potatoes and sausage separately, though the texture of the mash may change slightly upon reheating.
  • Reheating: For the best results, reheat in the oven or on the stovetop rather than microwaving, as this helps preserve the texture of the sausages and the fluffiness of the mash.

8. Final Thoughts

Creating authentic Bangers and Mash at home is all about embracing the flavors and textures of British cuisine. By carefully selecting quality ingredients, taking time to caramelize the onions for the gravy, and making creamy mashed potatoes, you can recreate this beloved pub classic in your own kitchen. Whether enjoyed on a chilly evening or as part of a cozy weekend meal, Bangers and Mash is sure to bring comfort and satisfaction to the table.

Scotch Egg with Curry Mayo From Pro Chef

Scotch Egg with Curry Mayo From Pro Chef

Creating an authentic Scotch egg with curry mayo is a delightful twist on the classic British recipe. The combination of seasoned sausage encasing a perfectly soft-boiled egg, then fried to crispy perfection, is a treat in itself. Add a side of creamy curry mayo, and you elevate this humble snack to something truly special. Here’s a detailed guide on how to make Scotch eggs with curry mayo from scratch, including tips on achieving the perfect runny yolk, adding curry spices, and preparing the mayo.

1. Introduction to the Scotch Egg

Scotch eggs are believed to have originated in England as a portable snack for travelers. Traditionally, a Scotch egg consists of a hard- or soft-boiled egg wrapped in sausage meat, coated in breadcrumbs, and deep-fried until golden and crispy. In this version, we’re adding a bit of spice to the sausage mix and pairing it with curry mayo to bring in extra flavor and a hint of the exotic.

2. What You Need to Make Real Scotch Eggs with Curry Mayo

Ingredients:

For the Scotch Eggs:

  • 4 large eggs (for boiling)
  • 1 egg (for egg wash)
  • One pound of sausage (beef or pig sausages work nicely)
  • 1/2 cup all-purpose flour
  • 1 cup breadcrumbs (panko or regular)
  • Salt and pepper, to taste
  • 1/2 teaspoon smoked paprika (optional, for smoky flavor)
  • 1 teaspoon fresh parsley, chopped
  • 1 teaspoon mustard powder (optional, for flavor)
  • Vegetable oil, for frying

For the Curry Mayo:

  • 1/2 cup mayonnaise
  • 1 teaspoon curry powder
  • 1/2 teaspoon lemon juice
  • 1/4 teaspoon honey (optional, for sweetness)
  • Salt and pepper, to taste

3. Preparing the Eggs

  1. Boil the Eggs: To achieve a soft center, boil four eggs for about 6-7 minutes. This should give a slightly runny yolk once cooked. If you prefer a firmer center, boil them for 8-9 minutes.
  2. Cool and Peel: To halt the cooking process, remove the eggs and submerge them right away in icy water. Peel the eggs gently to prevent shattering the whites after around five minutes.

Scotch Egg with Curry Mayo

4. Seasoning the Sausage Meat

Put the sausage meat and the spices of your choice in a mixing dish.

  • Add Seasonings: Season the meat with salt, pepper, smoked paprika, mustard powder, and fresh parsley. To guarantee that the flavors are distributed evenly, thoroughly mix.
  • Divide the Meat: Separate the sausage mixture into four equal portions. Each portion will be used to encase one egg.

5. Wrapping the Eggs in Sausage

  1. Prepare a Flat Disc of Sausage: Take one portion of sausage and flatten it into a round disc on a piece of cling film or parchment paper. The meat should be thick enough to wrap the egg without breaking but thin enough for even cooking.
  2. Wrap the Egg: Place one peeled egg in the center of the sausage disc. Carefully wrap the sausage around the egg, making sure it’s fully enclosed. Pinch any open seams to seal the sausage around the egg completely.
  3. Repeat: Repeat this process with the remaining eggs and sausage portions.

6. Coating the Eggs

  1. Prepare Coating Stations: Set up three shallow bowls. Place flour in one bowl, a beaten egg in the second, and breadcrumbs in the third.
  2. Coat the Scotch Egg:
    • Shake off any extra flour after rolling the egg in sausage wrapper.
    • Dip it into the beaten egg, making sure it’s well-coated.
    • Gently push it into the breadcrumbs to make sure it is evenly coated.
  3. Double Coating (Optional): For extra crispiness, you can repeat the egg wash and breadcrumb steps for a thicker crust.
Scotch Egg with Curry Mayo

7. Frying the Scotch Eggs

  1. Heat Oil: In a deep saucepan or fryer, heat vegetable oil to about 350°F (175°C). You’ll need enough oil to submerge the Scotch eggs fully.
  2. Fry the Scotch Eggs: Carefully lower each Scotch egg into the hot oil. Fry for about 5-7 minutes or until the coating is golden brown and crispy.
  3. Drain: Use a slotted spoon to remove the Scotch eggs from the oil and place them on a paper towel-lined plate to drain excess oil.
  4. Bake for Extra Crispiness (Optional): For an even crunchier texture, place the fried Scotch eggs in a preheated oven at 350°F (175°C) for an additional 5 minutes.

8. Making the Curry Mayo

While the Scotch eggs are cooling, prepare the curry mayo:

  1. Combine Ingredients: In a small bowl, mix the mayonnaise with curry powder, lemon juice, honey (if desired), salt, and pepper.
  2. Adjust Seasoning: Taste the curry mayo and adjust the seasoning or add more curry powder if you prefer a stronger flavor.
  3. Chill: Let the curry mayo sit in the fridge for a few minutes to allow the flavors to meld.

9. Serving the Scotch Eggs

Once the Scotch eggs have cooled slightly, it’s time to serve them:

  1. Halve the Eggs: For a beautiful presentation, slice each Scotch egg in half to reveal the yolk. A slightly runny yolk adds a creamy texture that complements the sausage and crisp coating.
  2. Serve with Curry Mayo: Place a generous dollop of curry mayo on the side or drizzle over the Scotch eggs for a pop of flavor.
  3. Garnish: Sprinkle some extra parsley or chives on top for added color.

10. Tips for the Perfect Scotch Egg

  • Using Fresh Sausage Meat: High-quality, fresh sausage meat improves flavor and texture. If you’re using store-bought sausages, remove the casing.
  • Prevent Cracking: Handle the boiled eggs gently to prevent cracking, especially if you want a soft yolk.
  • Double Coating for Extra Crunch: If you want a crunchier shell, double-coat the eggs by dipping them in egg wash and breadcrumbs twice.
  • Experiment with Seasonings: You can add spices like garlic powder or fennel to the sausage mix for a personalized flavor.
Scotch Egg with Curry Mayo

11. Variations on the Classic Recipe

  1. Herb-Infused Scotch Eggs: Mix the sausage mixture with chopped fresh herbs, such as parsley, chives, or rosemary.
  2. Spicy Scotch Eggs: Add cayenne pepper or chili flakes to the sausage mix if you like a spicy kick.
  3. Baked Version: If you prefer to avoid deep-frying, bake the Scotch eggs at 400°F (200°C) for about 25 minutes, turning halfway.

12. Serving Suggestions and Storage

Scotch eggs with curry mayo make a delicious snack or appetizer. They’re perfect for picnics, parties, or as part of a British-themed brunch. If you have leftovers:

  • Store: For up to three days, keep them in the refrigerator in an airtight container.
  • Reheat: Reheat in a preheated oven at 350°F (175°C) for 5-10 minutes to restore the crispiness.

Final Thoughts

Making authentic Scotch eggs with curry mayo is both rewarding and delicious. The golden, crispy exterior with seasoned sausage, a creamy egg yolk, and tangy curry mayo makes this dish unforgettable. Enjoy experimenting with spices and flavors to make the dish your own, and serve it as a unique, hearty addition to any meal.

A Simple and Fast Recipe for Yorkshire Pudding

A Simple and Fast Recipe for Yorkshire Pudding

Creating an authentic Herbed Yorkshire Pudding that’s flavorful, golden, and slightly crisp is a fantastic way to enhance any British-inspired meal. Here’s a comprehensive guide to crafting this traditional English side dish with an herbal twist. We’ll delve into ingredients, techniques, and cooking tips to ensure your Yorkshire puddings are as delicious and authentic as possible.

1. Understanding Yorkshire Pudding and its Origins

Yorkshire Pudding is a classic British dish typically served as a side with roast meats, particularly beef. Traditionally, Yorkshire Pudding is made from a simple batter of eggs, milk, and flour, baked until it rises into a puffy, golden delight with a tender, airy interior. The key to creating the perfect Yorkshire Pudding lies in the batter consistency, oven temperature, and hot fat for baking.

Why Add Herbs?

Adding herbs like rosemary, thyme, and chives brings an earthy, aromatic layer to the pudding, which beautifully complements the richness of roast meat and gravy. Herbs also add an element of freshness, creating a delightful contrast to the crispy texture.

Yorkshire Pudding
Yorkshire Pudding


2. Ingredients for Herbed Yorkshire Pudding

To make Herbed Yorkshire Pudding, you’ll need the following ingredients:

  • 1 cup all-purpose flour
  • 1 cup whole milk
  • 3 large eggs
  • 1/2 teaspoon salt
  • 1 tablespoon fresh rosemary, finely chopped
  • 1 tablespoon fresh thyme leaves
  • 1 tablespoon fresh chives, chopped
  • Vegetable oil or beef drippings

Ingredient Tips

  • Use fresh herbs for the best flavor. Cut the amount in half if you’re using dried herbs.
  • Beef drippings add a rich, traditional flavor, but vegetable oil can be used for a lighter option.

3. Preparing the Batter

The batter for an excellent Yorkshire pudding should be lump-free and smooth. This is how to make the ideal batter:

  1. Combine Dry Ingredients: Sift the flour and salt into a mixing bowl. Sifting helps aerate the flour, ensuring a smooth batter without lumps.
  2. Whisk the Eggs and Milk: In a separate bowl, whisk the eggs until frothy, then add the milk, continuing to whisk until well combined.
  3. Mix Wet and Dry Ingredients: Make a well in the center of the flour, then pour in the egg-milk mixture gradually, whisking continuously. Aim for a smooth, lump-free consistency similar to heavy cream.
  4. Add Herbs: Gently fold in the chopped rosemary, thyme, and chives, ensuring even distribution. Keep the batter covered and let it to rest at room temperature for at least half an hour. Resting allows the flour to absorb the liquid fully, resulting in better rise and texture.
Yorkshire Pudding
Yorkshire Pudding

4. Preheating and Preparing the Pan

One of the most important steps in making Yorkshire Pudding is preheating the pan and fat.

  1. Choose the Right Pan: Traditionally, a muffin tin is used for individual puddings. However, you can also use a large baking dish for a single, family-style pudding.
  2. Add Oil or Drippings: Pour about 1/2 teaspoon of vegetable oil or a small amount of beef drippings into each muffin cup (or enough to coat the bottom of a large dish).
  3. Heat the Fat: Preheat the oven to 425°F (220°C). Place the pan with the oil in the oven for about 10 minutes until the oil is very hot and slightly smoking.

5. Baking the Herbed Yorkshire Pudding

Baking with hot fat ensures the batter starts cooking immediately, giving it the characteristic puff. Here’s how to get the perfect rise:

  1. Pour the Batter: Carefully pour the batter into each muffin cup (or the large pan) with hot oil, filling each one about halfway. The batter should sizzle as it hits the hot oil, signaling that it’s hot enough.
  2. Bake Without Peeking: Bake in the preheated oven for 20-25 minutes for individual puddings or 30-35 minutes for a large pudding.

    To avoid deflating the puddings, resist the temptation to open the oven door.

    When the puddings are done, they should be puffy and golden brown. While the inside will be soft and sensitive, the edges will be crisp.

  3. Serve Immediately: Yorkshire Puddings are best enjoyed fresh out of the oven when they’re still puffed and warm.

6. Tips for the Perfect Yorkshire Pudding

Achieving an authentic Yorkshire Pudding requires a few essential tips and tricks:

  • Room Temperature Ingredients: Using room temperature eggs and milk helps the batter mix smoothly and contributes to better rising in the oven.
  • Rest the Batter: Resting the batter allows the gluten in the flour to relax, which improves the texture.
  • Hot Oil: Before adding the batter, make sure the oil is very hot. This helps the pudding rise and creates a crispy bottom.
  • High Heat: Yorkshire Puddings require a hot oven, so make sure your oven is fully preheated.
Yorkshire Pudding
Yorkshire Pudding

7. Variations for Your Herbed Yorkshire Pudding

Experiment with herbs or other additions to customize your Yorkshire Pudding:

  • Cheese Addition: For a cheesy twist, sprinkle a bit of grated cheddar or Parmesan cheese on top of the batter before baking.
  • Garlic Flavor: Add a pinch of garlic powder to the batter for an extra savory kick.
  • Spiced Up: A small dash of nutmeg or a hint of black pepper can add depth to the flavor, especially if you’re serving it with roast beef.

8. Serving Suggestions

Yorkshire Pudding is traditionally served with a roast meal, usually accompanied by beef, vegetables, and gravy. Here are some pairing ideas:

  • Classic Roast Beef: Serve the pudding with slices of roast beef, roasted vegetables, and rich gravy.
  • Roasted Chicken: Pairing with chicken adds a lighter, yet equally delicious, option.
  • Vegetarian Option: For a vegetarian meal, serve the pudding with mushroom gravy or roasted root vegetables.

9. Troubleshooting Common Issues

If your Yorkshire Puddings didn’t rise or aren’t as crisp as you hoped, here are some solutions:

  • Didn’t Rise: This could be due to under-heated oil or a batter that’s too cold. Make sure both the oil and batter are at the right temperature.
  • Deflated After Baking: This is normal to some extent, but if they deflate drastically, try increasing the oven temperature slightly or baking a bit longer.
  • Too Dense: If your Yorkshire Pudding turned out dense, try resting the batter longer or using a bit more liquid.

10. Storing and Reheating

Yorkshire Puddings are best eaten fresh but can be stored for a day or two:

  • Refrigerate: Store leftovers in an airtight container in the refrigerator for up to two days.
  • Reheat: Put in a hot oven (approximately 375°F or 190°C) for 5 to 8 minutes to reheat. They will go mushy if you microwave them.

Final Thoughts

An authentic Herbed Yorkshire Pudding offers a delicious, savory addition to any meal, especially with roast beef. The blend of herbs adds complexity to the traditional pudding, complementing its rich, hearty flavor. With the right techniques and a few tips, you’ll be able to make perfect Yorkshire Puddings every time, creating a memorable dining experience that reflects true British culinary tradition.

Happy cooking!

How Many Calories Are In Cheese?

How Many Calories Are In Cheese? Can Eating Cheese Help You Lose Weight?

Cheese is a staple in many diets around the world and offers a rich flavor profile with numerous health benefits. However, the question remains—can cheese actually help you lose weight? And how many calories does cheese contain? This article delves into the nutritional content of cheese, its health benefits, and ways to incorporate it into a weight-conscious diet safely. Read on for everything you need to know about enjoying cheese healthily.


1. How Many Calories Are in 100g of Cheese?

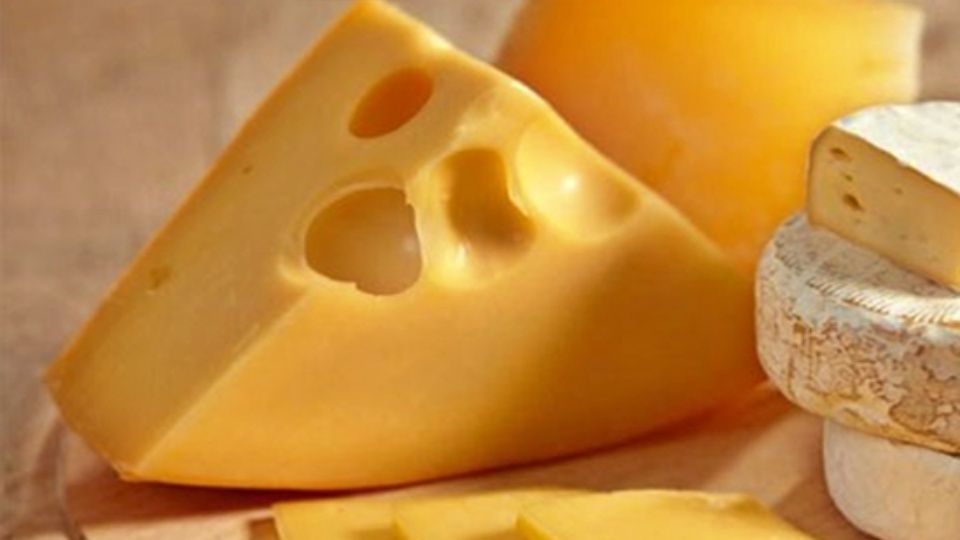
According to the United States Department of Agriculture (USDA), 100 grams of cheese contains approximately 402.5 calories. However, the kind of cheese affects the calorie content. For example, a small 15g piece of Laughing Cow cheese has about 67 calories, while a 100g serving of mozzarella cheese contains around 280 calories. The higher calorie count in cheeses like cheddar or Gouda makes them rich and satisfying but also means portion control is key.

Cheese
Cheese

2. Is Cheese Good for Your Health?

Cheese is more than just a flavorful ingredient—it’s also packed with essential nutrients that support bone health, immune function, and much more. Let’s examine the advantages in more detail:

  • Strong Bones and Teeth: Cheese contains calcium, vitamin A, B vitamins (especially B2, B12), and vitamin K2, all of which contribute to bone density and strength. Regular, moderate consumption of cheese can help maintain bone health and prevent osteoporosis as we age.
  • Cancer Prevention: Some studies suggest that the linoleic acid found in cheese can help reduce cancer risk, as it may inhibit cancer cell growth and aid in fighting free radicals.
  • Heart Health: Cheese contains fats that help keep arteries clear and reduce stroke risk when consumed in moderation. Omega-3 fatty acids and vitamin K2, especially in cheeses made from grass-fed animals, are beneficial for cardiovascular health.

In short, cheese offers several health benefits when eaten in moderation, with a focus on high-quality and unprocessed varieties.

3. Does Eating Cheese Cause Weight Gain?

With its high fat content, some may wonder if cheese could lead to weight gain. However, cheese does not necessarily cause weight gain if eaten correctly. The key lies in portion control and pairing cheese with a balanced diet. Cheese, being rich in protein and healthy fats, can promote satiety, helping you feel full longer and reducing the tendency to snack on less healthy foods.

Furthermore, the calcium in cheese may encourage the body to burn fat, making it a surprising ally in weight management. The protein content in cheese also helps stabilize blood sugar, which is beneficial for energy levels and weight control.

4. A Sample Cheese-Based Meal Plan for Weight Management

Including cheese in your diet can be a healthy choice when done right. Here’s how to add cheese to your diet without worrying about gaining weight:

  • Breakfast: Consider grating a small amount of cheese on whole-grain toast or adding it to a morning omelet with vegetables. The protein in cheese combined with fiber from whole grains and veggies will keep you full until lunch.
  • Salads: A sprinkle of feta or a slice of mozzarella in salads adds flavor and texture. Pair cheese with fiber-rich vegetables for a balanced and low-calorie meal.
  • Cheese with Fruit and Nuts: Combining cheese with fruits like apples or pears and a handful of nuts can be an excellent snack for midday. This combination is nutrient-dense and filling.
  • Cheese for a Savory Snack: Cottage cheese, often lower in calories and rich in protein, makes a great choice for a healthy snack. Add fresh herbs or a sprinkle of black pepper for extra flavor without added calories.

Keeping servings around 30-50 grams of cheese per meal can provide a satisfying, nutrient-rich addition to your diet without excessive calories.

Cheese
Cheese

5. Tips for Enjoying Cheese Safely and Effectively

While cheese offers many health benefits, there are some precautions to keep in mind to ensure you enjoy cheese safely:

  • Limit Intake: Experts recommend limiting cheese to about 50 grams per day to avoid excessive calorie intake. Larger portions of cheese can contribute too many calories and saturated fats, which may hinder weight loss goals.
  • Avoid Late-Night Cheese: Eating cheese late at night can sometimes lead to digestive discomfort, especially in those sensitive to dairy. Also, high-fat foods like cheese may interfere with sleep for some people.
  • Choose Low-Fat Cheeses When Possible: Low-fat cheese options, such as cottage cheese and mozzarella, have less saturated fat, making them ideal for weight management.
  • Watch Pairings with Cheese: Some foods don’t pair well with cheese for digestion or nutrition reasons. For example, combining cheese with leafy greens like spinach and swiss chard can sometimes interfere with calcium absorption due to oxalates in the greens. Similarly, try not to mix cheese with fish, soy-based foods, or high-tannin foods like tea to avoid digestive issues.

For children, it’s also wise to wait until they are at least one year old before introducing cheese to ensure that their digestive systems are ready.


6. Can Cheese Be Part of a Weight-Loss Diet?

The answer is yes, as long as it’s consumed thoughtfully. When included in a balanced diet and eaten in moderation, cheese can actually aid in weight loss efforts. Cheese’s protein and fat content help control hunger hormones, and its calcium content promotes fat burning. Here are some pointers for including cheese in a weight-loss plan:

  • Opt for Fresh, Unprocessed Cheeses: Choose options like ricotta, cottage cheese, and fresh mozzarella that are lower in fat than aged cheeses. They tend to be lower in calories but still provide protein and calcium.
  • Add Cheese to Fiber-Rich Foods: Cheese paired with fiber-rich foods, like whole grains, fruits, and vegetables, aids in digestion and promotes fullness, preventing overeating.
  • Moderate High-Calorie Cheeses: When enjoying richer varieties, such as cheddar or gouda, use small amounts to add flavor rather than relying on them as the main protein source.
Cheese
Cheese

7. Frequently Asked Questions about Cheese

Does Eating Cheese at Night Cause Weight Gain?
It’s generally safe to eat cheese at night in moderation, though large amounts could lead to indigestion in some people. High-fat foods before bed may also interfere with sleep quality, so opt for small portions if eating cheese in the evening.

Can I Lose Weight if I Eat Cheese Every Day?
Yes, but portion control is essential. Including a small amount of cheese in your daily diet can help you lose weight by satisfying cravings, but balance it with other nutrient-dense foods like vegetables, lean proteins, and whole grains.

What’s the Best Type of Cheese for Weight Loss?
Low-fat cheeses, such as cottage cheese and ricotta, are lower in calories and high in protein, making them ideal for weight loss. Harder cheeses like Parmesan can be used sparingly as a flavorful topping for dishes without adding too many calories.


With these guidelines, you can enjoy cheese as part of a balanced diet and take advantage of its nutritional benefits without fear of unwanted weight gain. By selecting the right types of cheese and keeping portions reasonable, cheese can fit well into a healthy lifestyle.

How Many Calories Are In An Egg?

How Many Calories Are In An Egg? Is It Good To Eat A Lot Of Eggs?

Eggs are a staple in many kitchens due to their versatility and high nutritional value. But have you ever wondered how many calories are in one egg? If you’re curious about the calorie content of eggs and how to incorporate them into a healthy diet, this article will guide you through the facts, myths, and best practices surrounding eggs. Let’s dive into the details of how eggs can be a part of your balanced diet, and how to enjoy them safely.

1. How Many Calories Are in One Egg?

The calorie count of an egg varies depending on its size. According to the U.S. Department of Agriculture (USDA), an average egg weighing about 50 grams contains approximately 72 calories. However, the calorie count can change based on the egg’s size:

  • Jumbo egg (63g): 90 calories
  • Extra-large egg (56g): 80 calories
  • Large egg (50g): 72 calories
  • Medium egg (44g): 63 calories
  • Small egg (38g): 54 calories

These values reflect the calorie count of raw eggs. When eggs are cooked, the calorie content might increase depending on the cooking method. For instance, a boiled egg typically contains around 78 calories, while frying an egg with cheese or oil can raise its calorie count to anywhere between 95 and 120 calories.

Moreover, there’s a significant difference between the calorie content in the egg yolk and the egg white. The yolk of a large egg contains around 55 calories, while the white part holds only about 17 calories.

Eggs
Eggs

2. Nutritional Components of Eggs

Eggs are not only low in calories but are also packed with essential nutrients. Here’s a closer look at the nutritional breakdown of an egg:

Protein

Eggs are an excellent source of high-quality protein, which is vital for building and repairing tissues, producing enzymes, and supporting immune function. One large egg provides around 6.28 grams of protein, with the egg white contributing approximately 3.6 grams. This makes eggs an ideal food for people looking to increase their protein intake.

Fats

Most of the fat content in eggs is concentrated in the yolk. A large egg contains just under 5 grams of fat, with about 1.6 grams being saturated fat. The yolk also contains healthy omega-3 fatty acids, which help reduce inflammation and lower the risk of chronic diseases such as heart disease, cancer, and arthritis.

Cholesterol

A large egg contains about 186 milligrams of cholesterol, which may raise concerns for some individuals. However, not all cholesterol is harmful. Cholesterol serves important functions in the body, such as producing hormones and vitamin D. Studies have shown that for most healthy individuals, consuming 1–2 eggs per day does not increase the risk of heart disease.

However, if you have diabetes or high cholesterol, it’s advisable to limit egg consumption to around 4–6 eggs per week and monitor your intake of other high-fat foods.

Cholesterol
Cholesterol

Carbohydrates

Eggs contain a minimal amount of carbohydrates, with one large egg providing only 0.36 grams. This makes eggs a low-carb, high-protein option for those following specific dietary plans like keto or low-carb diets.

Vitamins and Minerals

Eggs are rich in various vitamins and minerals. B-vitamins, such as vitamin B2 (riboflavin) and vitamin B12 (cobalamin), are especially abundant in them. These vitamins are necessary for both sustaining a healthy neural system and producing energy.

Eggs also include biotin, folate, choline, vitamin A, vitamin E, and vitamin D. Most of these nutrients are found in the yolk, while riboflavin is present in the white.

Eggs also offer essential minerals such as selenium, calcium, iodine, and phosphorus. Selenium acts as a powerful antioxidant that protects the body from damage caused by free radicals and reduces the risk of heart disease and certain types of cancer.

3. Is It Healthy to Eat a Lot of Eggs?

While eggs are a nutrient-dense food, moderation is key. Eggs contain a significant amount of cholesterol (approximately 200mg per egg), and it is recommended to limit dietary cholesterol to less than 300mg per day. For this reason, it’s best to consume no more than two yolks a day and limit your weekly intake to around three yolks. However, you can enjoy egg whites more liberally, as they are low in fat and calories while being high in protein.

People with hypertension, heart disease, or atherosclerosis should be particularly cautious when consuming eggs, especially the yolks. Combining eggs with vegetables or fruits can help balance cholesterol levels and promote overall health.

4. Key Considerations When Eating Eggs

To maximize the health benefits of eggs, it’s essential to avoid combining them with foods that could cause digestive issues or reduce their nutritional value. For instance:

  • Avoid drinking tea with eggs: The tannic acid in tea can make eggs difficult to digest.
  • Do not pair eggs with soybeans or soy milk: This can hinder protein absorption.
  • Avoid eating eggs with foods like rabbit meat, persimmons, or pork brains: These combinations can cause indigestion.
  • Refrain from frying eggs with garlic: This combination can produce harmful compounds.

It’s also important not to consume eggs that have been stored for too long or left overnight. To lower the risk of foodborne infections, make sure eggs are cooked all the way through..

Refrain from frying eggs with garlic

5. How to Safely Eat Eggs

For some people, eggs can trigger allergic reactions. Typical signs of an allergy to eggs include:

  • Nasal congestion
  • Coughing or chest tightness
  • Nausea, vomiting, or cramps
  • Anaphylaxis (in severe cases)
  • Hives around the mouth or other areas of the body

Additionally, consuming raw eggs carries the risk of salmonella infection, which can cause fever, cramps, and dehydration. To minimize the risk, it’s crucial to store eggs properly—refrigerate them after purchase—and cook them thoroughly. Eggs should reach an internal temperature of 160°F (71°C) to ensure safety.

If you prefer consuming raw eggs, opt for pasteurized eggs, which have been treated to kill bacteria without cooking the egg.

6. Tips for Using Eggs in a Weight Loss Diet

Eggs are low in calories and high in protein, which can help you feel full and reduce your overall calorie intake. Here are some tips for incorporating eggs into a weight loss diet:

  • Eat boiled eggs: Boiling preserves the nutritional content of eggs while keeping the calorie count low.
  • Avoid high-calorie additions: Limit the use of oils, cheese, and other high-calorie ingredients when preparing eggs.
  • Consume eggs for breakfast: Starting your day with eggs can keep you feeling full for longer and help curb hunger throughout the day.
  • Pair eggs with vegetables: Combining eggs with fresh vegetables or salads increases your intake of fiber, vitamins, and minerals, which can enhance the weight loss process.
  • Drink plenty of water: Staying hydrated supports digestion and can help control your appetite.

It’s generally safe to consume up to two eggs per day, but limit your weekly intake to three days to avoid digestive discomfort.

7. Common Questions About Eggs

Is Eating Raw Eggs Beneficial?

Raw eggs are often consumed for their supposed health benefits, such as improving brain function, supporting healthy pregnancy, and strengthening bones. However, the risks of salmonella and poor nutrient absorption outweigh the benefits. Always consider pasteurized eggs if you prefer them raw.

Do Eggs Cause Weight Gain?

Eggs are nutrient-dense and help create a feeling of fullness, making them an excellent choice for weight management. A large egg contains only 78 calories. When eaten with vegetables, eggs can contribute to weight loss by reducing overall calorie consumption.

What Foods Should You Avoid Eating with Eggs?

While eggs are generally versatile, avoid combining them with:

  • Persimmons
  • Fish
  • Pig brains
  • Potatoes
  • Garlic
  • Soy milk
  • Dairy
  • Tea

In conclusion, eggs are an affordable, nutritious, and versatile food that can be easily incorporated into a healthy diet. By being mindful of how you prepare and consume them, you can enjoy their benefits while minimizing any risks. Whether you’re aiming to lose weight or maintain a balanced diet, eggs can be a great addition to your meal plan.

How Many Calories Are In Sweet Potatoes?

How Many Calories Are In Sweet Potatoes? Will Eating A Lot Make You Fat?

Sweet Potatoes: Calories, Benefits, and a 7-Day Weight Loss Meal Plan

Sweet potatoes are a staple food that many of us are familiar with. But do you know exactly how many calories they contain? If not, don’t worry! This article will reveal the calorie content of sweet potatoes and show you how to incorporate them into your diet for effective weight loss.

Sweet potatoes are a popular choice for those looking to shed some pounds due to their delicious taste, filling nature, and cost-effectiveness. Let’s dive deeper into the calorie content of sweet potatoes, the health benefits they offer, and how to create a sustainable and satisfying meal plan for weight loss.

Sweet Potatoes
Sweet Potatoes

1. How Many Calories Are in Sweet Potatoes?

  • Purple Sweet Potatoes: According to the National Institute of Nutrition, 100 grams of purple sweet potatoes contain approximately 86 calories. This low-calorie count makes them a go-to option for people aiming to reduce calorie intake while still enjoying a nutritious, filling food.
  • Honey Sweet Potatoes: These sweet, caramel-like potatoes contain a slightly higher calorie count. Based on data from the International Clinic of Medical Sciences, 100 grams of honey sweet potatoes have about 103 calories. Despite this slight difference, they remain a healthy and nutrient-rich option for any diet.
  • Fried Sweet Potatoes: Be careful with this preparation method! Fried sweet potatoes contain significantly more calories. According to the International Clinic of Medical Sciences, 100 grams of fried sweet potatoes contain around 165 calories. If you’re looking to lose weight, it’s advisable to limit fried foods in general due to their high fat content.
  • Boiled Sweet Potatoes: In comparison to their fried counterparts, boiled sweet potatoes maintain the same caloric value as raw purple sweet potatoes, clocking in at 86 calories per 100 grams. This is the healthiest way to enjoy sweet potatoes without adding extra calories from oils and fats.
  • Sweet Potato Fritters: Another variation of sweet potato preparation, fritters are both tasty and indulgent. However, they contain more calories than most other forms, with 185 calories per 100 grams, according to nutritional experts.

Sweet potatoes aren’t just about calories, though! According to the USDA (United States Department of Agriculture), they are packed with essential nutrients such as calcium, iron, magnesium, vitamin A, vitamin C, and vitamin B6, making them a great dietary option for a diet that is well-balanced..

2. Do Sweet Potatoes Cause Weight Gain?

Given their low-calorie content, sweet potatoes are not fattening and don’t contribute to significant weight gain when eaten in moderation. In fact, they can be a great addition to a weight loss plan, especially when prepared in healthier ways (boiling, steaming, baking) rather than frying.

Additionally, their fiber content prolongs feelings of fullness, which may reduce overeating. Furthermore, sweet potatoes are rich in complex carbohydrates, which provide a slow and steady release of energy, preventing blood sugar spikes and helping to control hunger.

Sweet Potatoes
Sweet Potatoes

3. Can Eating Sweet Potatoes Help You Lose Weight? When Is the Best Time to Eat Them?

Yes, sweet potatoes can aid in weight loss when consumed in the right amounts and prepared healthily. For the best results, it’s important to eat them at the right time of day.

  • Breakfast: Eating sweet potatoes in the morning can help boost your metabolism and energy levels. Some studies suggest that consuming them in the morning may help you lose weight up to four times faster than without them. Since sweet potatoes are rich in fiber, they’ll keep you feeling full until your next meal, reducing the chances of snacking.
  • Lunch: Many experts agree that lunchtime is the best time to eat sweet potatoes. The calcium content in sweet potatoes needs around four to five hours to be fully absorbed into the body. So, if you consume sweet potatoes at lunchtime, your body will benefit from this calcium intake by the late afternoon, which is optimal for nutrient absorption.

Avoid eating sweet potatoes late at night, as they are relatively starchy. While they won’t necessarily cause weight gain, eating them too late may cause bloating or interfere with digestion before bedtime.

4. 7-Day Weight Loss Meal Plan with Sweet Potatoes

Here’s a simple and effective 7-day meal plan using sweet potatoes as the core ingredient to help you lose weight without compromising on nutrition or taste. This plan incorporates a variety of healthy foods that complement sweet potatoes for a balanced diet.

Day 1: Boiled Sweet Potatoes and Hard-Boiled Eggs

On the first day, you might feel tired due to a reduction in calorie intake, so it’s essential to ensure your body gets enough nutrition. Pairing boiled sweet potatoes with hard-boiled eggs offers a well-rounded meal with essential proteins and vitamins.

  • Breakfast: Breakfast consists of two hard-boiled eggs and one boiled sweet potato.
  • Lunch: Boiled sweet potatoes with a side of steamed vegetables.
  • Dinner: A small portion of baked chicken breast with a salad.

Day 2: Sweet Potatoes, Vegetables, and Nuts

Introduce a variety of vegetables, fruits, and nuts into your meals. These will not only keep you full but also provide essential vitamins and minerals.

  • Breakfast: A salad made with boiled sweet potatoes, mixed greens, and a handful of nuts.
  • Lunch: Grilled vegetables with sweet potato wedges.
  • Dinner: A light vegetable soup with a small serving of sweet potatoes on the side.

Day 3: Sweet Potatoes and Bananas

Bananas are another nutritious food that pairs well with sweet potatoes. They are rich in potassium and help prevent muscle cramps.

  • Breakfast: Boiled sweet potatoes with a banana smoothie.
  • Lunch: Sweet potato and banana oatmeal (combine mashed sweet potatoes, bananas, and oats).
  • Dinner: A small portion of fish with a side of sweet potatoes and a banana for dessert.

Day 4: Sweet Potatoes with Lean Meat (Chicken, Pork, Beef)

By the fourth day, your body will have adjusted to the lower calorie intake. Adding lean meat will help replenish proteins and maintain muscle mass.

  • Breakfast: A boiled sweet potato with a small serving of lean pork.
  • Lunch: Grilled chicken breast with sweet potato fries (baked, not fried).
  • Dinner: Beef stir-fry with sweet potato chunks and broccoli.
Sweet Potatoes
Sweet Potatoes


Day 5: Sweet Potatoes and Soy Milk

For a lighter meal, try sweet potatoes paired with soy milk, which is low in calories but rich in essential nutrients.

  • Breakfast: 1 boiled sweet potato and a glass of unsweetened soy milk.
  • Lunch: Sweet potato and soy milk soup.
  • Dinner: A tofu salad with sweet potato slices on the side.

Day 6: Sweet Potatoes and Oats

Oats are filling and work well in combination with sweet potatoes for a fiber-rich, energy-boosting meal.

  • Breakfast: Sweet potato and oat porridge (combine mashed sweet potatoes with oats and a splash of almond milk).
  • Lunch: Sweet potato and oat pancakes.
  • Dinner: A small serving of grilled salmon with roasted sweet potatoes and oats on the side.

Day 7: Sweet Potatoes and Yogurt

Yogurt provides probiotics that are beneficial for digestion, while sweet potatoes offer fiber that helps regulate bowel movements.

  • Breakfast: A smoothie bowl with sweet potatoes, yogurt, and a sprinkle of granola.
  • Lunch: Sweet potato wedges with a side of yogurt dip.
  • Dinner: Baked sweet potatoes with a drizzle of honey and a cup of plain yogurt.

5. Why Sweet Potatoes Are Great for Weight Loss

Incorporating sweet potatoes into your diet is a great way to enjoy delicious meals while working towards your weight loss goals. They are low in calories, rich in fiber, and loaded with essential nutrients like vitamins A and C, calcium, and iron. Their versatility in the kitchen allows you to prepare them in numerous ways, so you won’t get bored of eating the same thing every day.

Remember, the key to weight loss is not just eating fewer calories but also eating the right calories. Sweet potatoes offer a healthy, nutrient-dense alternative to other starches and can be the perfect companion on your weight loss journey.

By following the 7-day meal plan above, you can enjoy a variety of tasty dishes, keep your energy levels high, and lose weight at a steady, healthy pace. Keep experimenting with different sweet potato recipes, and you’ll find they make weight loss an enjoyable experience!